Converting KIT data
To convert KIT we require a few steps. It may look like a bit at first, but once you undertsand the process it can be done in a very short amount of time.
Because KIT data consists of multiple files unlike Elekta data which consists of a single .fif file, the main object is the parent folder containing the .con, .mrk, .elp, and .hsp files.
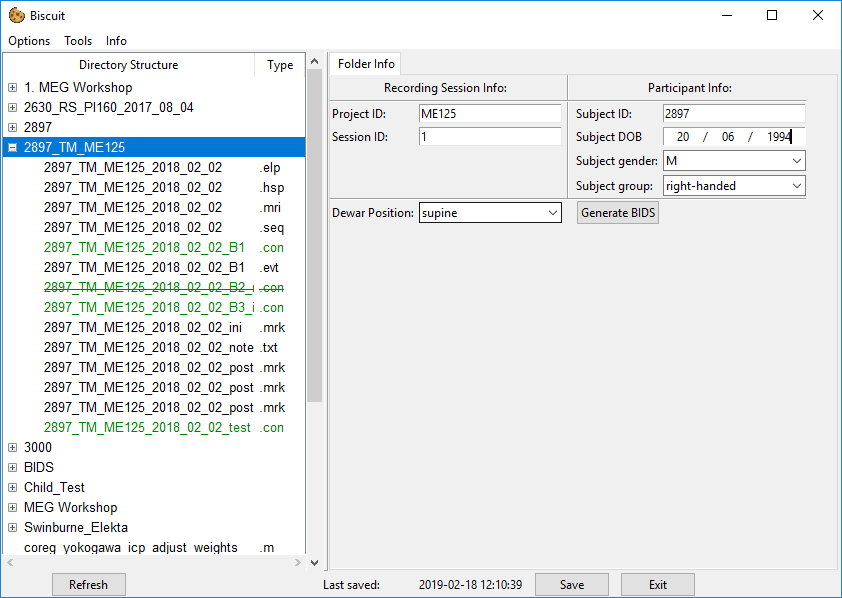
KIT data folder
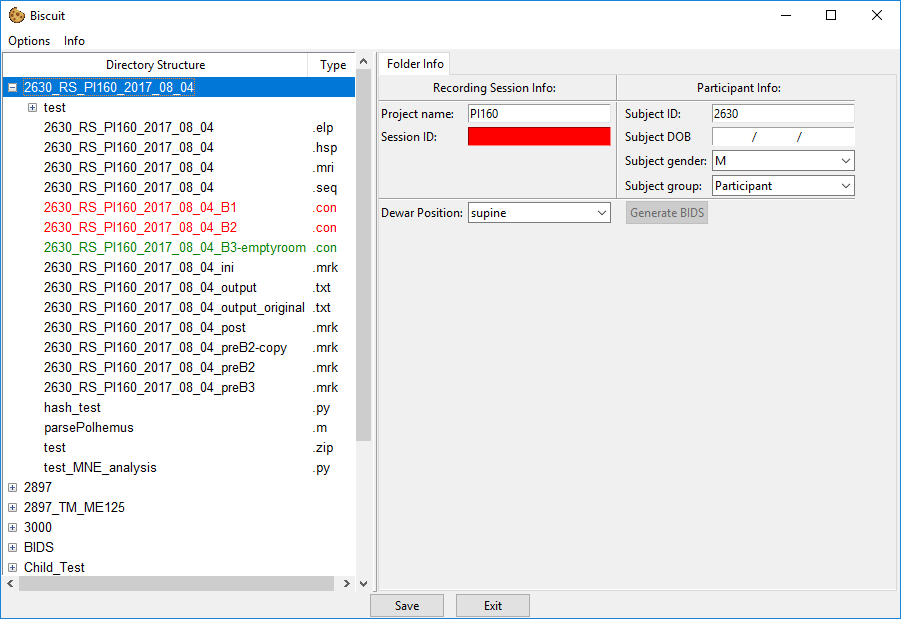
When you first click on a folder containing all the required files the info panel will be populated with a number of info boxes and entires:
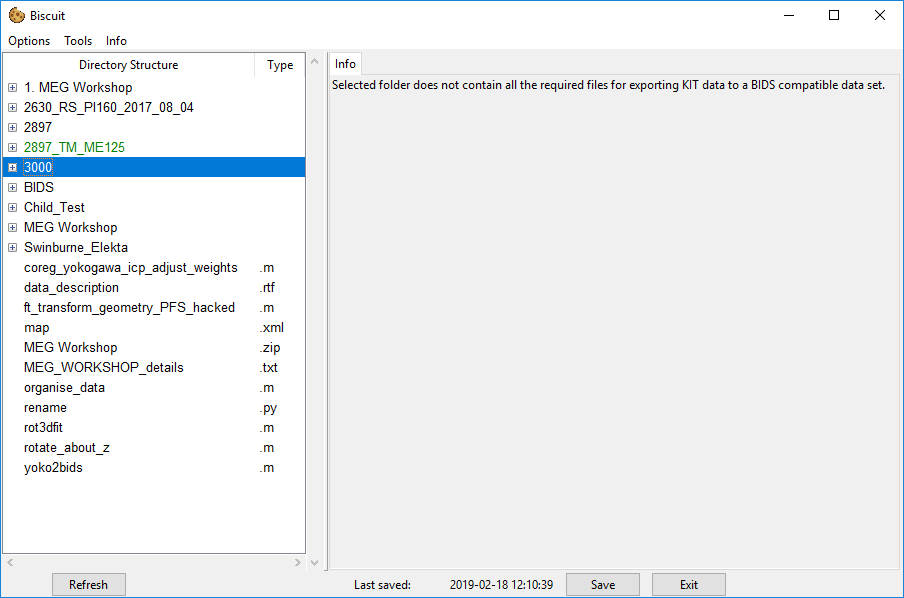
If you however select a folder which doesn't contain all the required files, the information panel will inform you of this
We require some information to be filled out on this screen:
Required information
- Project Name: ID of the project. This should match the project ID specified in the project settings so that any default values can be applied automatically.
- Session ID: Session number with the particular participant.
Subject information
- Subject ID: The ID used to identify the participant in a confidential manner.
- Subject DOB: The date of birth of the participant. This is entered in dd/mm/yyy format (sorry America!).
- Subject Gender: One of M (Male), F (Female), U (Unknown).
- Subject Group: The group within the study the participant belongs to. THe default values are
ParticipantandControl, however these can be set in the project default settings.
Other information
- Dewar Position: How the Dewar is positioned. You have a choice of supine or upright.
Before the Generate BIDS can become active all child .con files must appear green in the file treeview to indicate they have been all the required information (or are junk in some cases). See the following section on how to prepare each .con file.
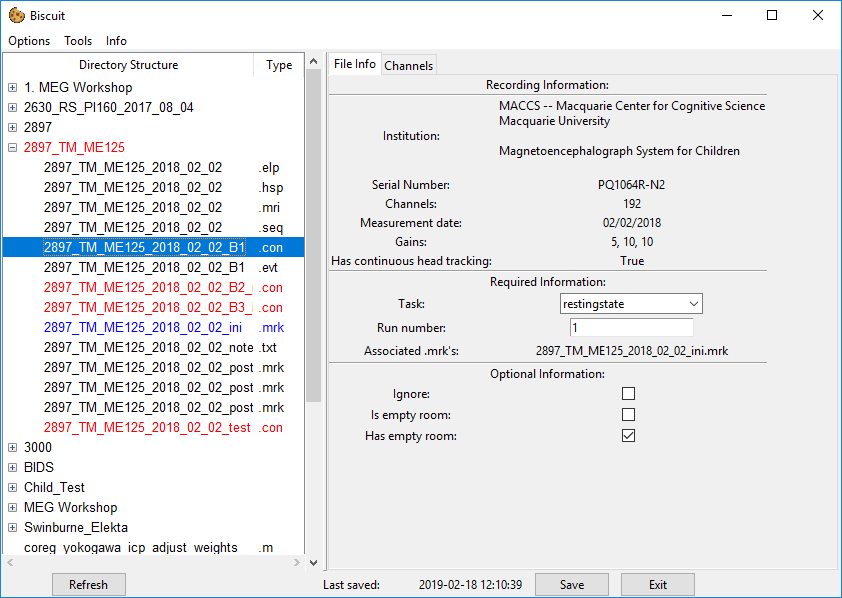
.CON file window
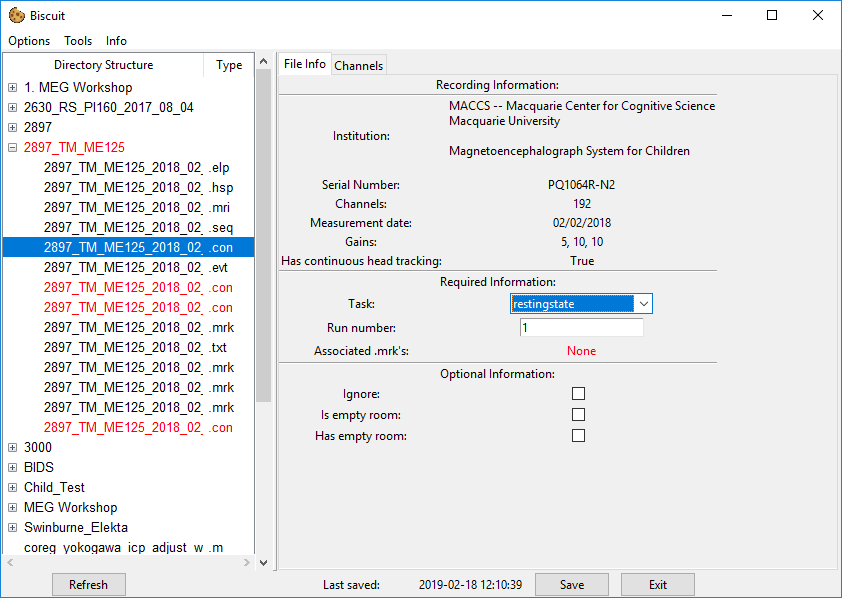
The .con file is the primary building block of KIT data and as such eash one requires a reasonable amount of information for BIDS conversion to happen.
Experimental information
Required information
- Task: A shorthand identifier for the task performed.
- Run: An integer identifier for the run or block number (often just
1,2etc.). - Associated .mrk's: A list of any
.mrkfiles that are associated with this.confile. Details on how to do this here
Optional information
- Ignore: This indicates that the
.confile isn't needed as part of the data set. The file will not be copied to the BIDS folder. - Is empty room: If this is selected the file is specified as the empty room data. Empty room data is copied to a different location and named based on the date of the recording. You should only select one empty room recoring per day otherwise any other existing empty room recording will be overwritten by the new one.
- Has empty room: If this is selected the BIDS data will contain a path pointing to the location of empty room file from the same recording day. Note that there is not check on whether or not this empty room file actually exists as this data can be produced after the BIDS conversion occurs for this file. If you do not have any empty room data that was taken on the same day as this con file, do not check this box as the data will not be correct.
Channel information
It is often important to specify if a certain channel is bad, or if a channel has any trigger information on it so that MNE can process this information properly and MNE-BIDS can produce the correct event information on export.
If you have set up any default channels when setting up your project defaults, then you will automatically see any channels specified as trigger channels in the channel tab, along with their default trigger description.
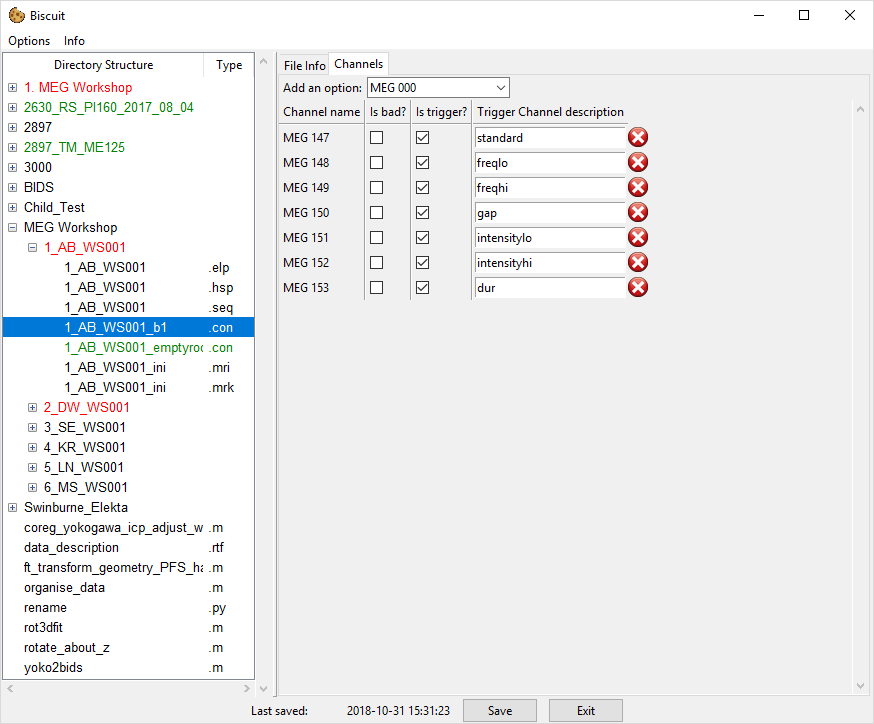
You can however add any other channel detected in the .con file to add to the list if you need to add extra trigger channels for the particular recording.
Associating an .mrk file
It is crucial for each .con file to know what .mrk file was used during the recording.
We can associate a .con file with an .mrk file in one of 3 different ways, all achieved by right-clicking on the .mrk or .con file in question.
- Right-click on a
.confile and selectassociate. This will prompt you to select an.mrkfile to associate with the.confile. You can do this by right-clicking the.mrkfile you wish to associate and then selectingassociate. - Right-click on an
.mrkfile and selectassociate. Same as above but you select the.confile the.mrkis to be associated with. - Right-click on an
.mrkfile and selectassociate with all. This will associate the selected.mrkfile with every.confile in the same directory.
Once an .mrk has been associated with a .con file, selecting a .con file will highlight any associated .mrk files in blue in the file treeview on the left hand side. You can use this to confirm that you have associated the correct .mrk file with the correct .con file.
Note that you cannot associate more than 2 .mrk files with any given .con file. If 2 .mrk files are associated with the one .con file you will need to select the .mrk in the file tree and select the acquisition time, which is one of "n/a" (used when you have only one .mrk associated with a .con file), 'pre' (indicates the .mrk file was recorded before the raw data was collected), and 'post' (indicating the .mrk file was recorded after the raw data was collected).
Exporting the data
When all the required information has been entered, the Generate BIDS button will become active.
To export you simply press this button once and a popup will appear which gives the current progress of the export process.
Once the conversion is done the popup will close and the data will available in the BIDS folder in the file view.